
Introduction
I wasn't originally planning on writing a post about my budget 10gbe router build. However, after going through a lot of trial and error and failing to find a simple tutorial, I've felt it would be best to make a guide for others that may be wanting to tackle the same thing. I'll also be going over mistakes I've made so hopefully anyone following a similar build will minimize the time they waste. Also note that I'm not a network engineer nor that experienced in FreeBSD, so this guide is geared more towards more users with little experience in FreeBSD / pfSense.
Difficulty: Novice - Intermediate
The End Goal:
- 10gbe equipment is usual expensive, but we want to build this on a budget
- We want performance acceptable enough so the LAN network isn't the bottleneck
- (Future) We want to setup OpenVPN to allow external clients to connect and access the lan resources such as the NAS server I have on the intranet.
Requirements for the Router:
- To function as a router, we want one port to talk to the internet (WAN) while the other ports are part of the same LAN network.
- We want the LAN devices to be able to talk to each other.
- We want the LAN devices to be able to connect to the internet.
- (Future) We want to setup OpenVPN
- (Future) We want the OpenVPN clients to be able to talk to the LAN devices
Part 1: Purchasing the hardware
Requirements
Before we begin, we need to secure some hardware. We either need a machine that comes with a 10gbe NIC, or we need to purchase a 10gbe network card.
The machine itself should be able to handle the load of both routing 10gbe traffic and the added computational load of encrypted OpenVPN traffic. Routing 10gbe traffic is easy enough, but we need to have a beefier CPU with AES-NI extensions to get any sort of performance out of OpenVPN.
Setup A: The Netgate Setup ($1000)
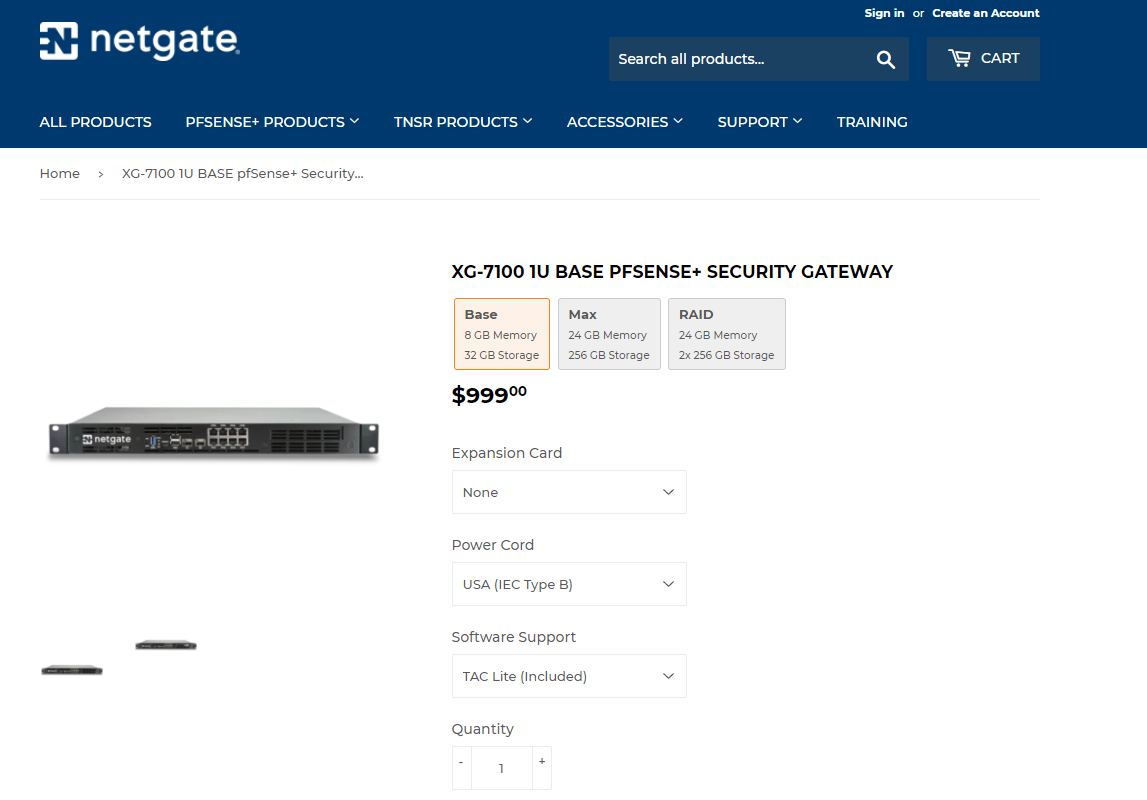
It's about $1000 for an out of the box 10gbe pfSense solution from the company that develops pfSense. We get all the benefits of support and hardware we know will work reliably in any setting. Although tempting, it's a bit out of my price range.
Setup B: The Amazon Setup ($695)
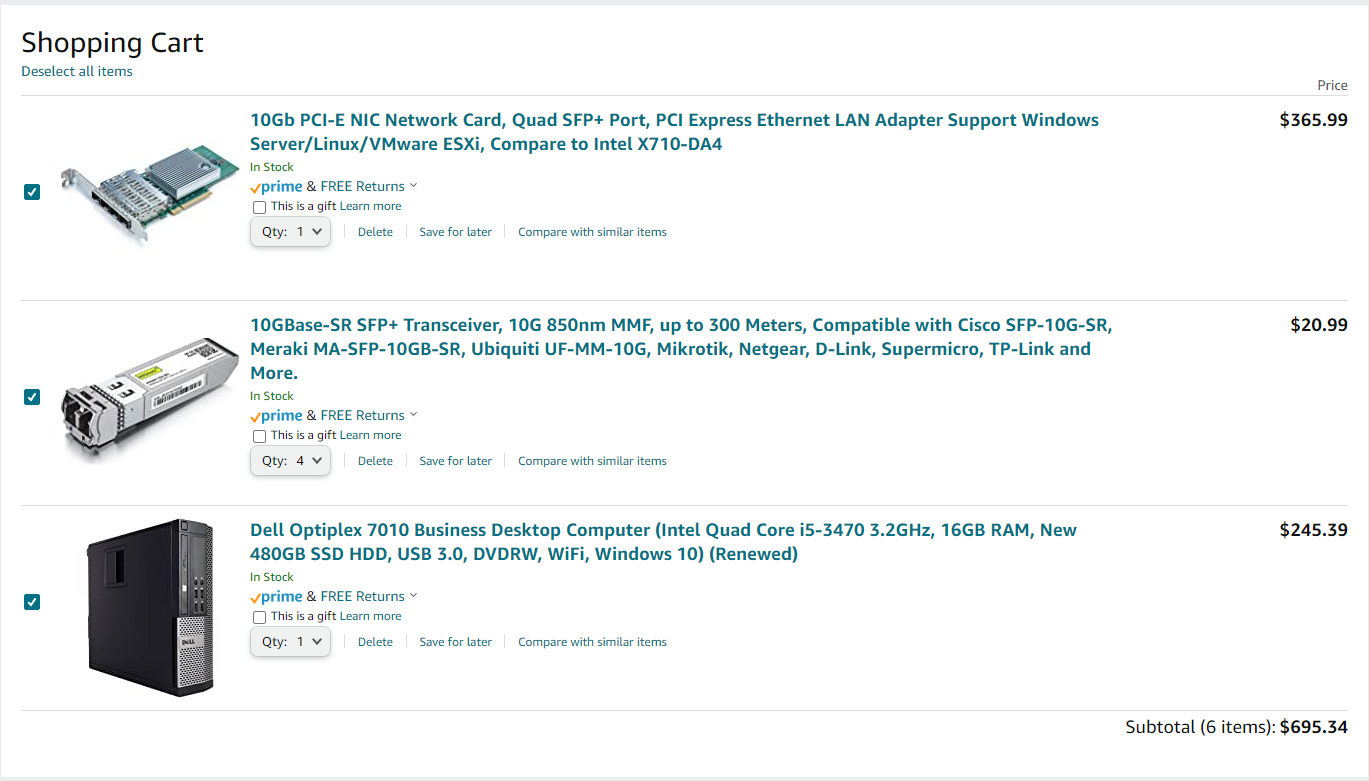
Using a refurbished desktop and a new 4-port 10gbe NIC adds up to just about $700. According the the Intel Website, the CPU supports AES-NI extensions so we're good to go on that end. Since fiber is actually cheaper with this build, I opted to use fiber instead of copper.
Setup C: The eBay Setup ($325)
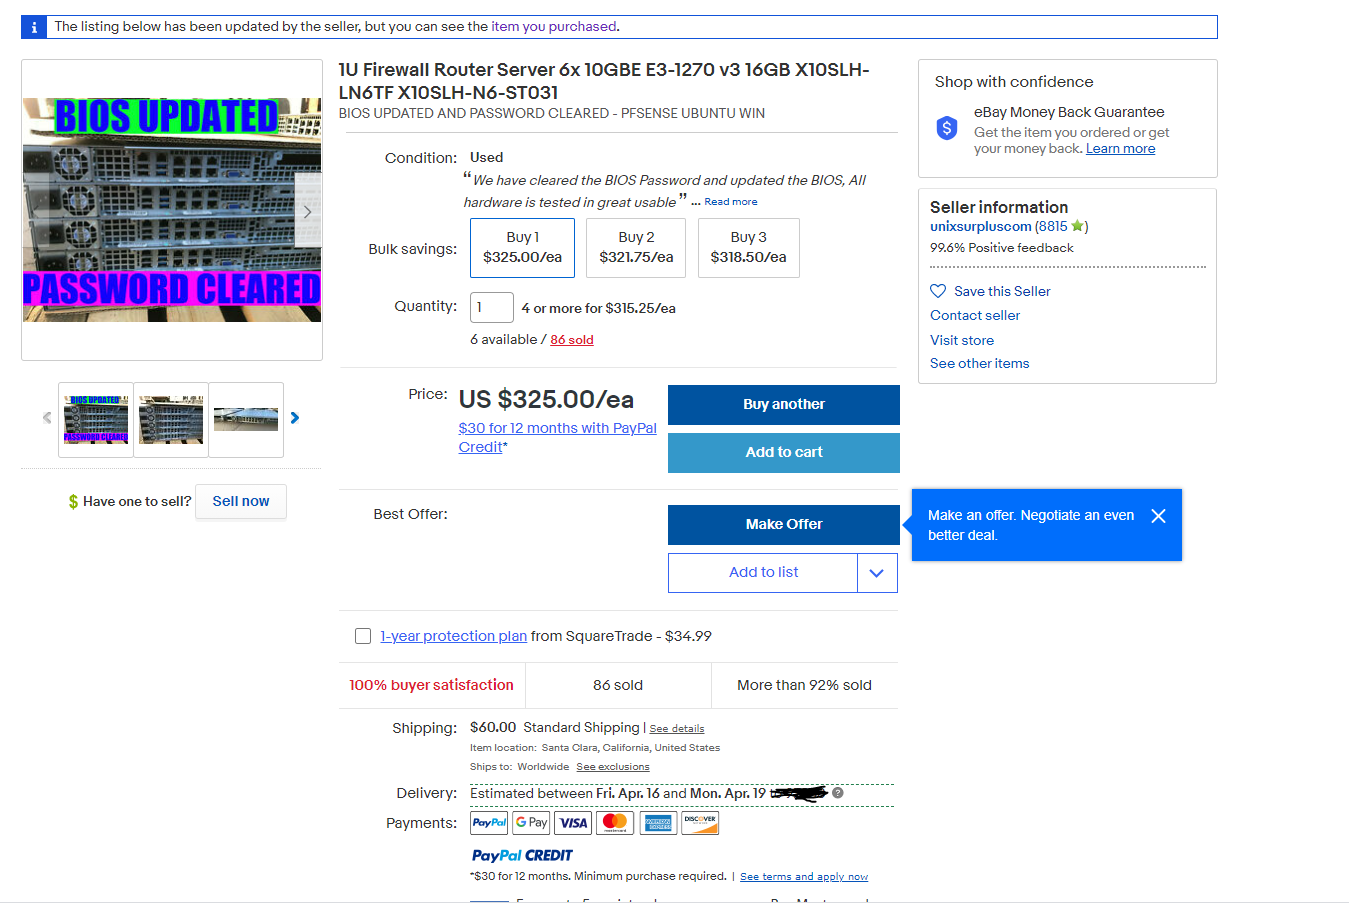
For $325, we get 6x 10gbe copper ports all in a nice 1U package at half the cost of our amazon setup. The processor also supports AES-NI extensions and the E3-1270v3 should have more than enough power to handle our workload.
Setup C is ultimately the one I ended up going with.
Part 2: My First Failed Setup - Using KVM to virtualize pfSense on a debian host
Note: Feel free to skip this section and proceed to "Part 3: Running pfsense bare metal" unless you were considering running pfSense as a virtual machine. This isn't part of the guide and is meant for reference.
Introduction
Since I'm used to virtualizing almost everything, my first plan of attack was to install Debian on the server and set pfSense up as a virtual machine in KVM. Setup is pretty straight-forward, although it can get a bit tedious to attach every network interface and bridge to the VM, especially during re-installs.
Since pfSense is inaccessible from WAN, I had to VNC into the VM and add a rule to allow my computer to connect to it from WAN. Following that, setup was nearly identical to setting up on bare metal.
The First Pitfall (Lan Connectivity Issues)
This sounds weird, but hear me out. If you only have one NIC attached to your virtual machine and forego attaching any others when you install pfSense, pfSense will not configure a Lan port. This will not seem like a big deal at first (since you can just add the interfaces and configure LAN yourself later), but things start to get weird.
It turns out if you never INITIALLY configured a LAN port during initial setup, setting up LAN later gives you all sorts of weird issues. Clients will just lose connectivity after a short while for no reason and packets won't even show up in packet capture. It was only fixed when I reinstalled pfSense and initially configured LAN.
If using virtualization, remember to attach ALL your NICs and configure a LAN port on initial setup!
I tested this by configuring a new VM with LAN and matching every setting to a new VM I didn't initially configure LAN on. The same issues appeared. There must be some other setup that runs in the background when you do initial LAN setup that need to be there for stability. It could also just be a bug with my version of pfSense, but I've read others in the Netgate forum running into the same issue.
Virtualization Performance
By utilizing just the default virtualization settings and drivers for the NICs, performance is pretty subpar. Using iperf3, I was only able to get a stable 1.2Gbit/sec from my test machine to the router.
Using Using PCI direct passthrough with virtio drivers provided the best performance in my case and I was able to get around 2.4Gbit/sec from my test machine to the router. Although people on the Netgear forum were claiming to get bare-metal speeds with virtualization, I wasn't able to get anywhere close with my setup.
Using direct PCI passthrough and virtio drivers gave me the best performance at 2.4Gbit/sec.
Host to guest VM network performance was about 4.8Gbit/sec using a virtual networked bridge.
Default OpenVPN performance was abysmal. Without AES-NI, I was only able to get about 48Mbit/s with one of the router's cores being maxed out at 100%. With AES-NI enabled and a bit of tweaking, that number went to about 105Mbit/s and interestingly, the CPU was only taxed at about 80% vs 100%.
OpenVPN best performance in virtualization was about 105Mbit/s
Summary
Although reinstalling pfSense was a lot easier in a VM than bare metal, the performance was pretty subpar, especially in the realm of OpenVPN. This is the biggest reason I've decided to go with bare metal. Keep in mind that at the time of this writing, the hardware I'm using is about 7-8 years old so more modern machines will likely give you much better performance if you virtualize pfSense.
Part 3: Setting up pfSense on bare metal
To re-iterate from before, we require our router to have the following:
- To function as a router, we want one port to talk to the internet (WAN) while the other ports are part of the same LAN network.
- We want the LAN devices to be able to talk to each other.
- We want the LAN devices to be able to connect to the internet.
- (Future) We want to setup OpenVPN
- (Future) We want the OpenVPN clients to be able to talk to the LAN devices
Now onto the actual guide part of the post:
1) Setting up pfSense is fairly straightforward. First, we'll download the pfSense image from the netgate website, using the AMD64 architecture.
2) We'll use a tool such as Rufus to flash the iso image onto a bootable USB drive and attach it to our server. We'll select a the USB key in the boot options and boot into the pfInstaller.
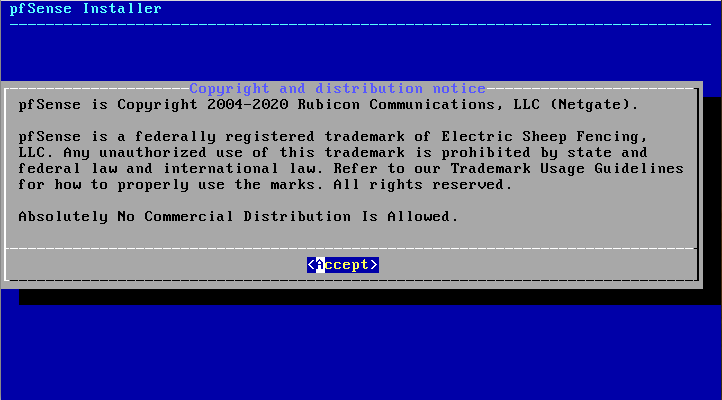
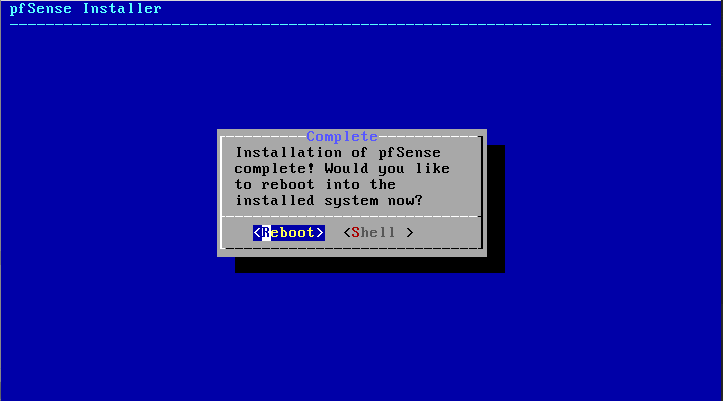
3) The options I went with for installation are:
- Copyright: Accept
- Keymap: Default Keymap
- Partitioning: Auto (UFW) BIOS
- Manual Configuration: No
- Complete: Reboot
4) The system will reboot and pfSense will pick up some ports to initially assign as WAN and LAN, as well as optional ports.
- Since my router was plugged into my local network already, pfSense found which port to use as the WAN port. (My Port: ix0)
- LAN port doesn't matter right now, but just make sure something is selected. (My port: ix1)
- We also want to add the remaining four ports as OPT1 - OPT4 when prompted (My ports: ix2, ix3, ix4, ix5). Note that in my build I also have another NIC I added to the server that gives me four more gigabit network ports (igb0 - igb3 as OPT5 - OPT8).
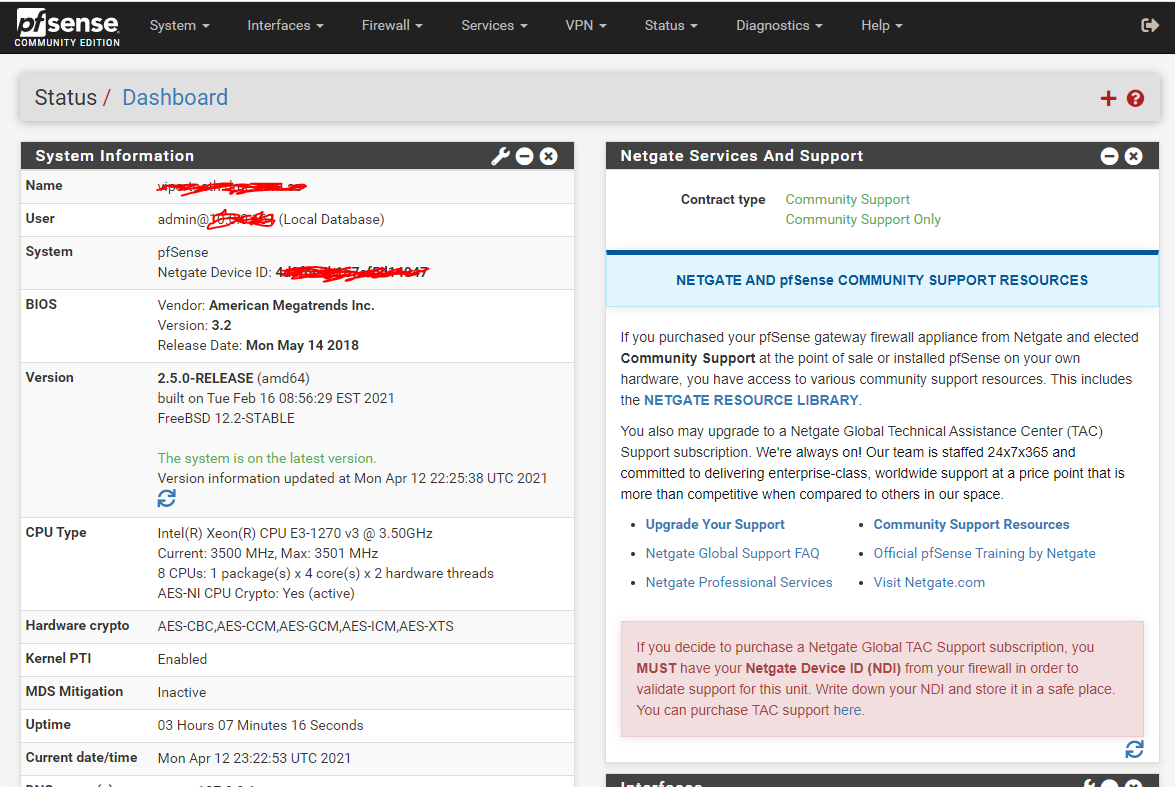
5) After the initial configuration, we'll be introduced to the main pfSense screen. Although the router WAN (10.0.0.169) is on the same network as my computer (10.0.0.24), by default we cannot the webConfigurator. To fix that:
- Press 8 to go into shell mode
- Type in: pfSsh.php playback enableallowallwan
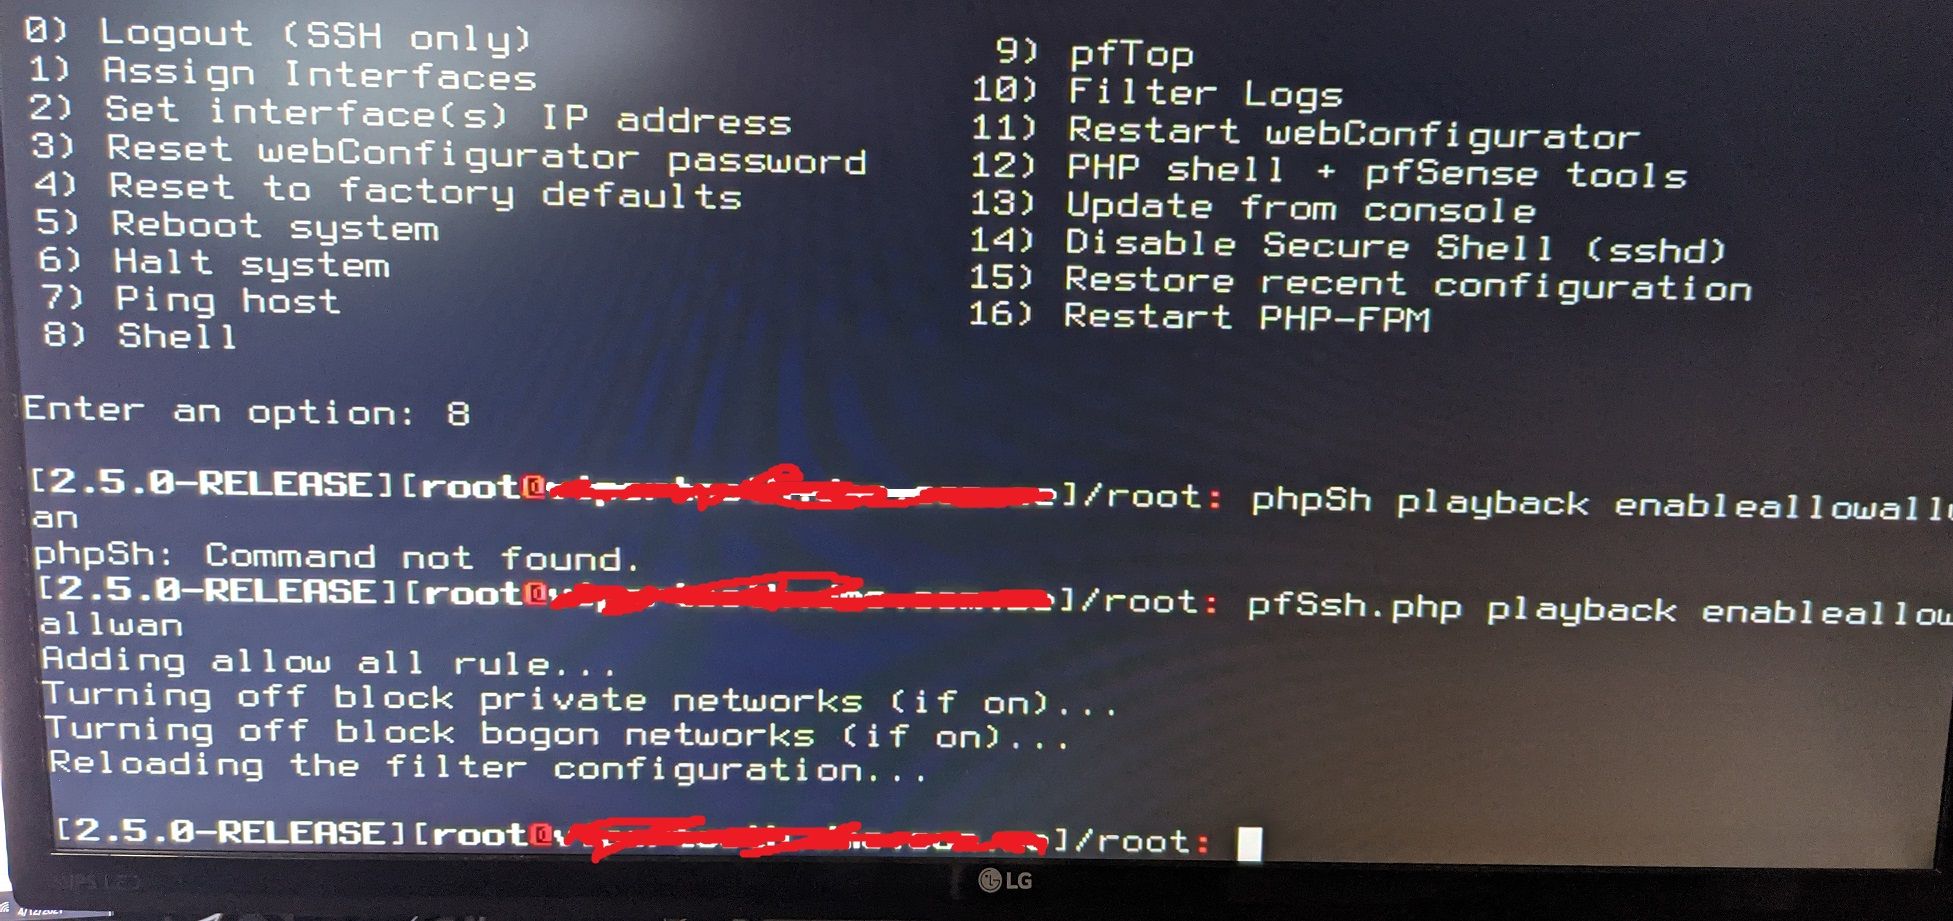
6) You should be able to access the web configurator now against it's WAN IP (Example: https://10.0.0.169/). By default, make sure your URL is https and not http. Default username/password are:
- Username: admin
- Password: pfSense
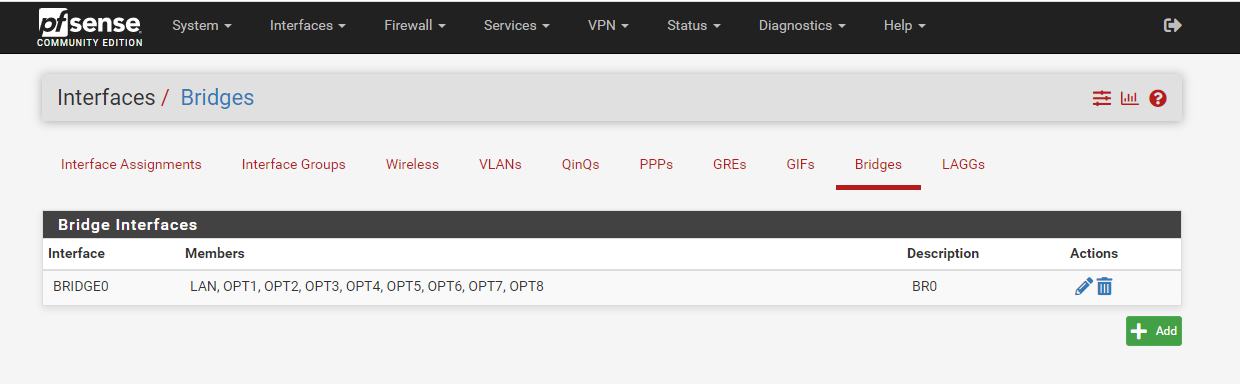
7) By default, pfSense only setup one port for LAN. Since we want all the ports to handle LAN like an average consumer router does, we'll want to bridge the default LAN port with every other port on the router.
- Goto Interfaces -> Assignments.
- Click on Bridges.
- Click add. Select every interface EXCEPT WAN.
- Description: BR0
- Click save.
8) To make firewall rules easier to modify later, we'll add all the interfaces to an interface group
- Click on Interface Groups
- Click on Add
- Name the group something like "BR0" or "LanBridge" or whatever
- Select every interface EXCEPT WAN
- Click save

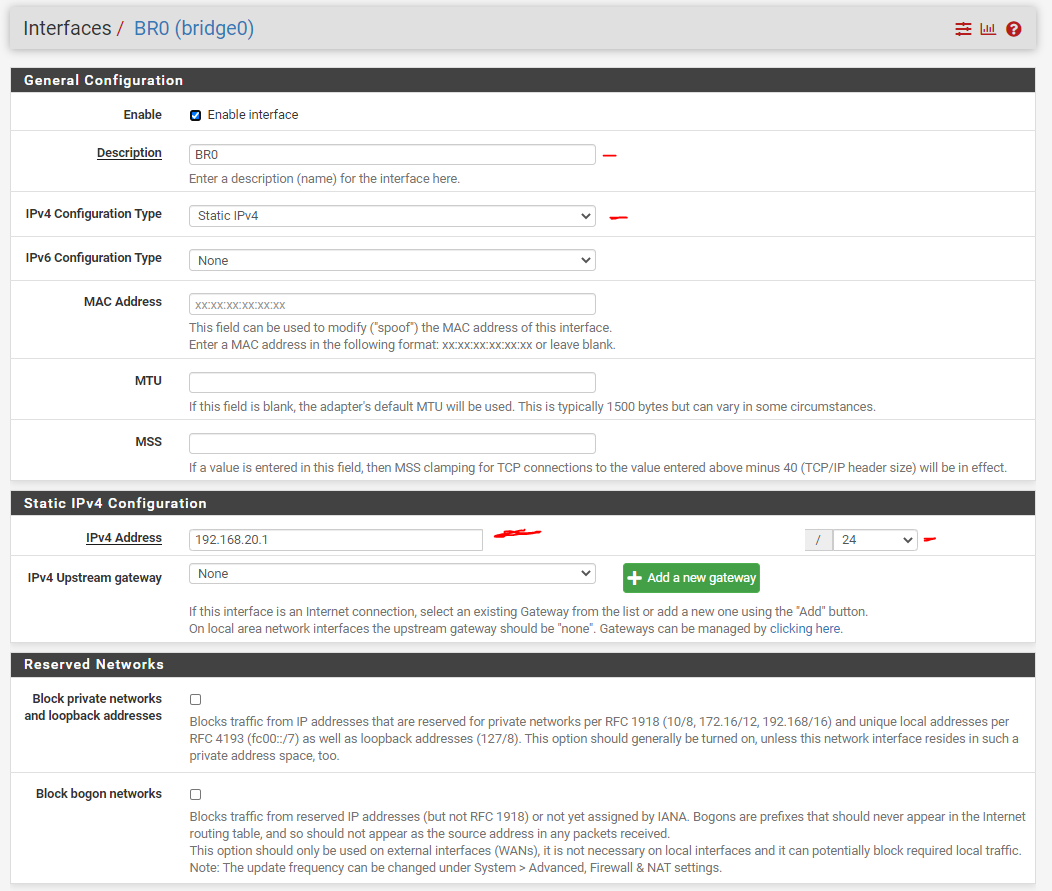
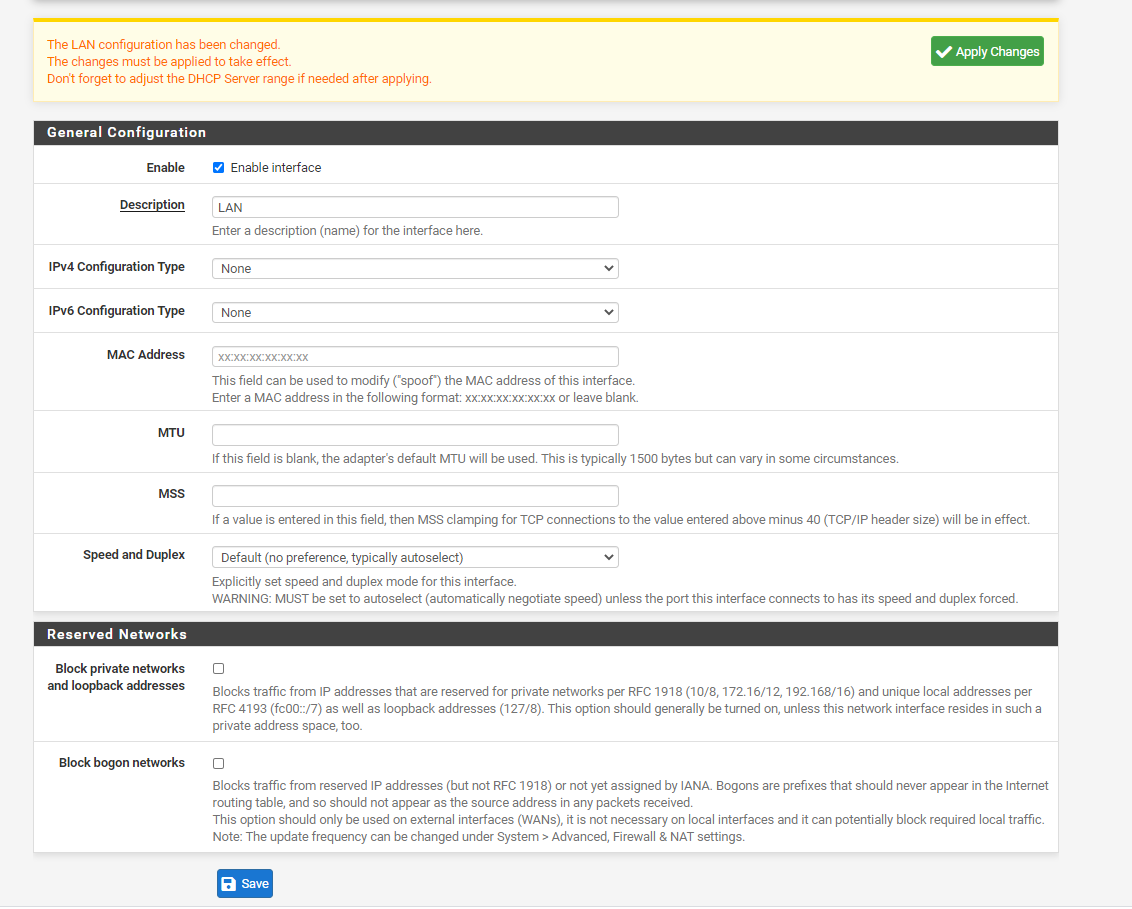
9) We'll now need to configure the bridge with our LAN settings and assign it a Static IPv4 address. Any device connected to our router can access the router at this IP address:
- On Interface Assignments, select BR0 and click Add.
- Click on BR0
- Click on "Enable Interface"
- Set IPv4 Configuration to Static IPv4
- For static IPv4 Address, set to 192.168.20.1/24 (or whatever you want your network to be).
- Make sure "Block private networks" and "Block bogon networks" are unchecked.
- Click Save
10) Now we need to allow our new through the firewall so clients are able to connect to the internet as well as talk to each other.
- Click on Firewall -> Rules
- Click on BR0
- Click on Add
- Protocol: Any
- Source: BR0 net
- Click Save
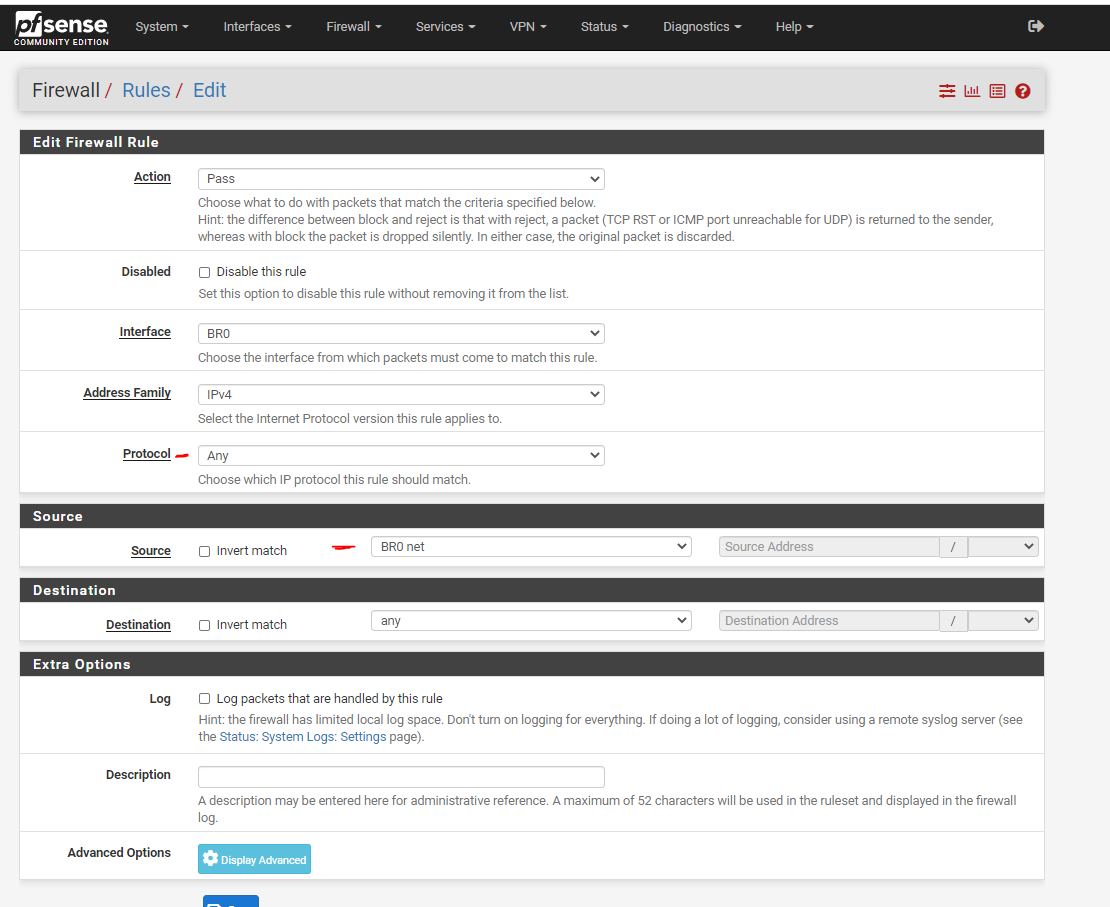
11) Click on LANBRIDGE and add the same firewall rule. I know this is redundant, but it fixed some connectivity issues for me.
- Click on Add
- Protocol: Any
- Source: BR0 net
- Click Save
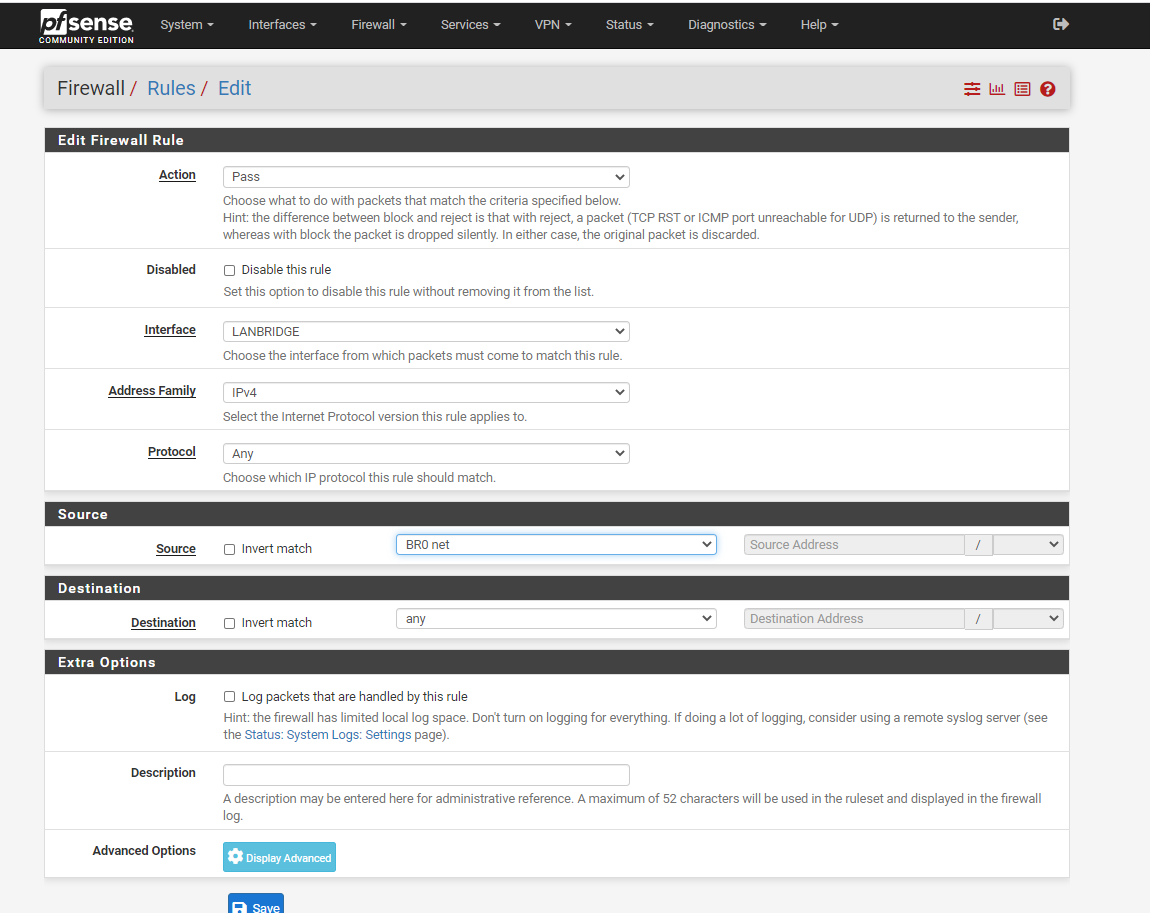
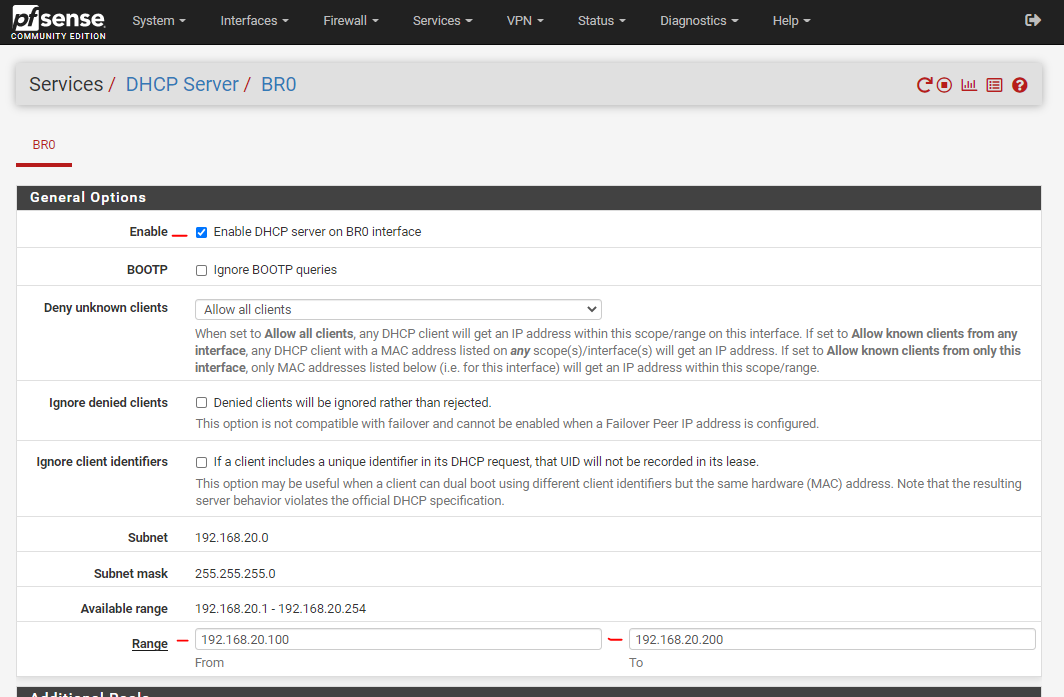
12) You should now have one firewall rule in LANBRIDGE and one in BR0. Now we need to move the DHCP Server from the initial LAN port to the bridge. This will allow the router to assign IPs to clients that plug into the LAN ports of our router.
- Goto Services -> DHCP Server -> LAN
- Uncheck "Enable DHCP server on LAN interface"
- Click save
- Select BR0
- Check "Enable DHCP Server on BR0 interface"
- Range: 192.168.20.100 - 192.168.20.200 (or whatever range of IPs you want to hand out)
- Click Save
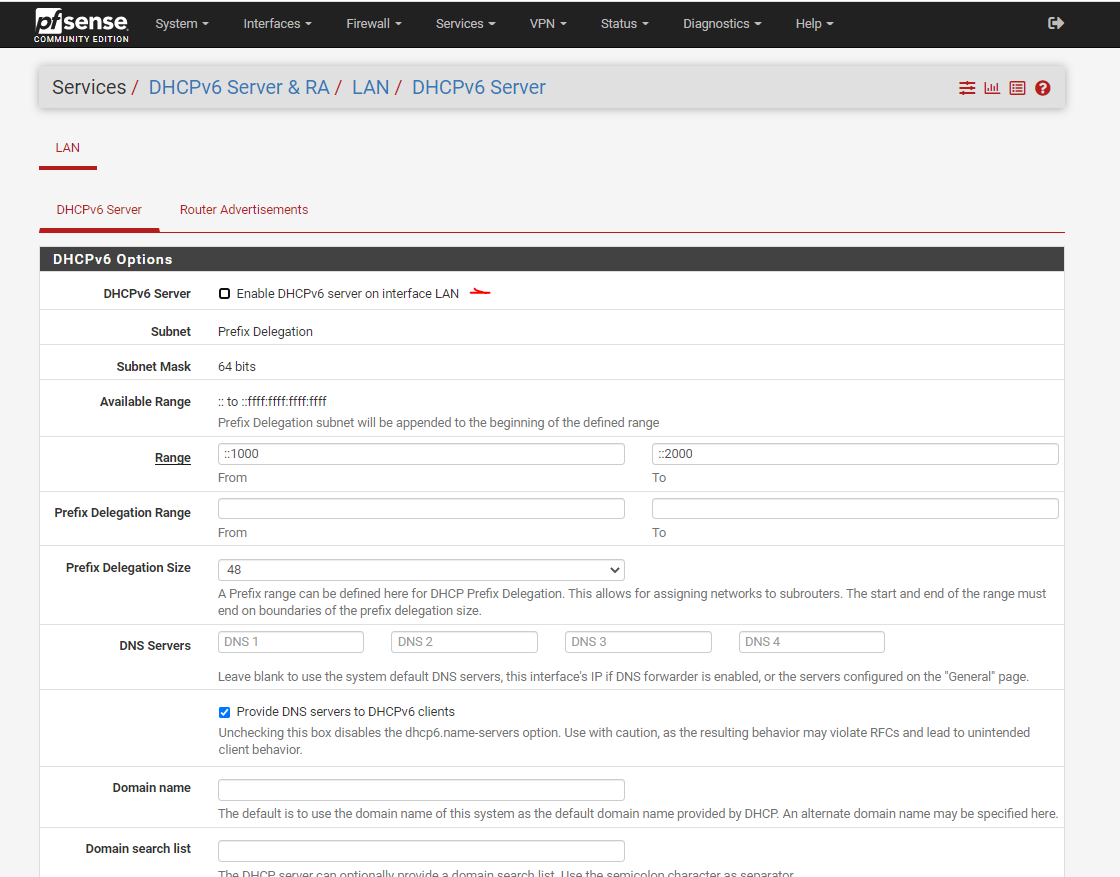
13) We'll also need to disable the DHCPv6 server / router advertisement on the initial LAN port.
- Goto Services -> DHCPv6 Server & RA -> LAN -> DHCPv6 Server.
- Uncheck "Enable DHCPv6 server on interface LAN"
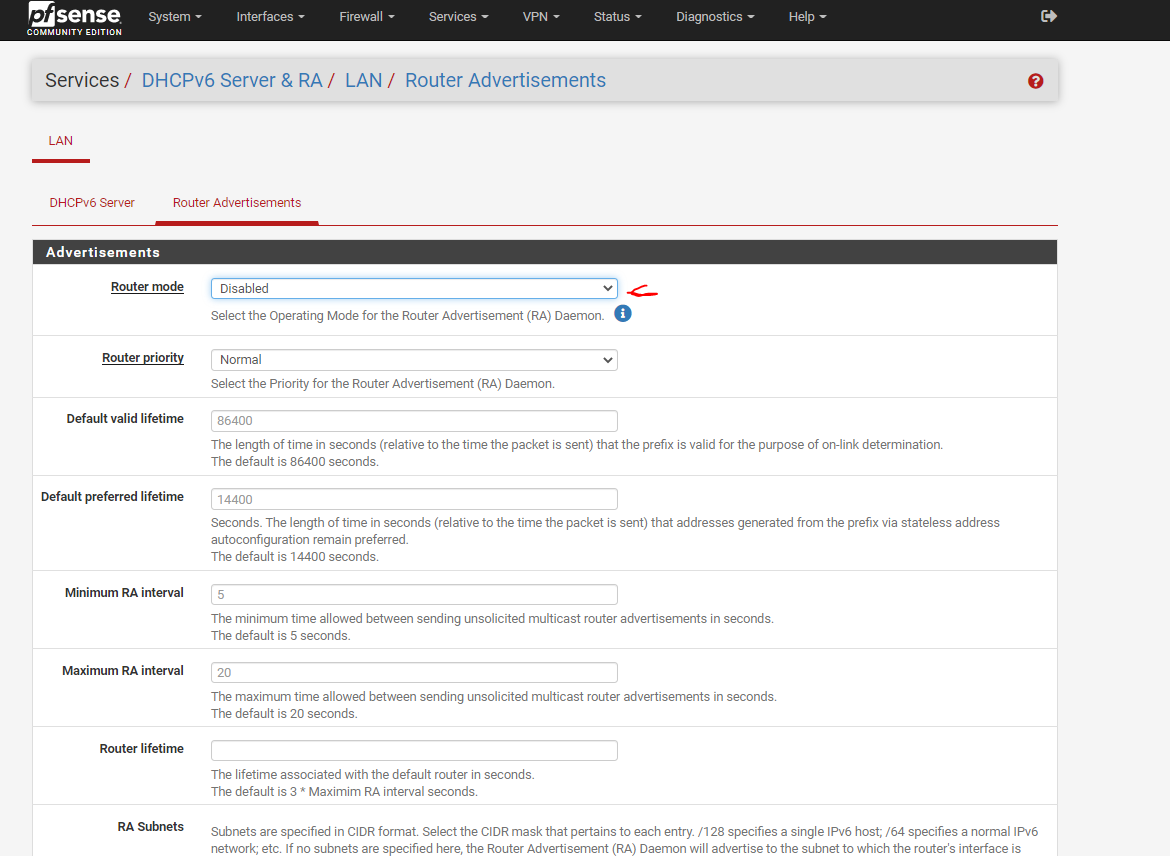
- Click Save
- Click on Router Advertisements
- Router Mode: Disabled
- Click Save
14) Finally, we'll need to clear the IPv4 and IPv6 configuration from the initial LAN interface
- Goto Interfaces -> LAN
- Set IPv4 Configuration to None
- Set IPv6 Configuration Type to None
- Click Save
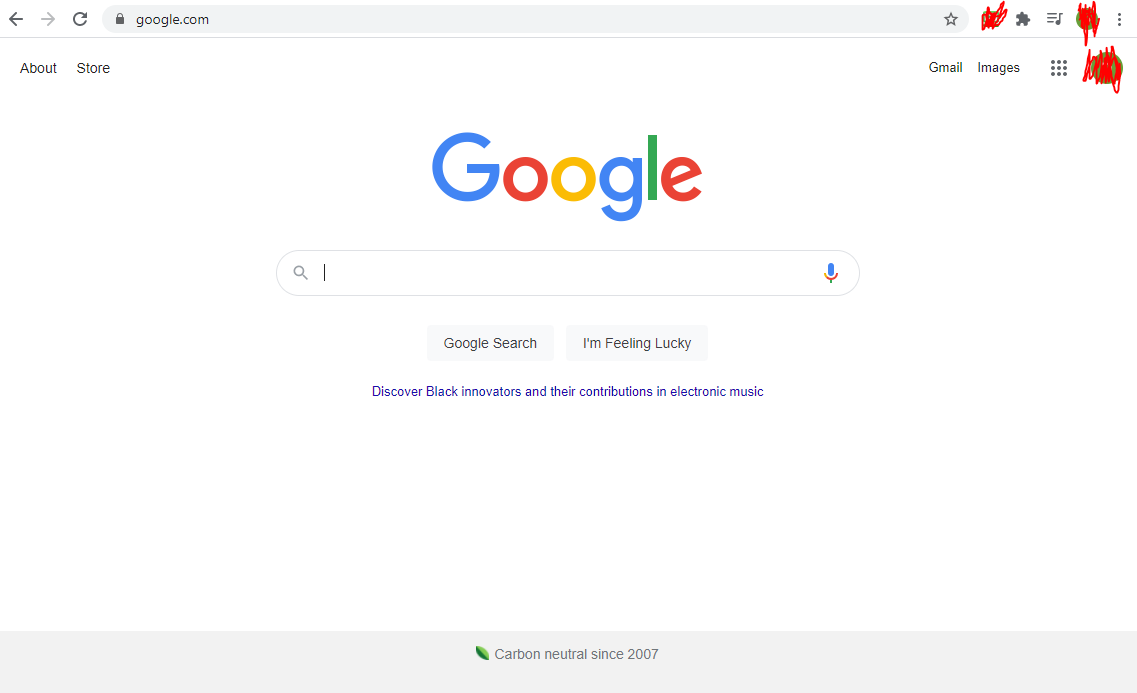
15) And we're done! We now have a fully functioning router. After plugging my computer into one of the ports, I'm able to access google just fine.
Part 5: Performance Analysis
I wanted to build a 10gbe router, so it'll be pretty disappointing if we didn't get decent speeds on the router. I used iperf3 for my test.
| Setup | Average Speed | Average CPU | ||
|---|---|---|---|---|
| Bare Metal | 5.9 Gb/s | 11% | ||
| KVM Virtualization (Optimized) | 2.4 Gb/s | 20% | ||
| KVM Virtualization (Default) | 1.2 Gb/s | 15% |
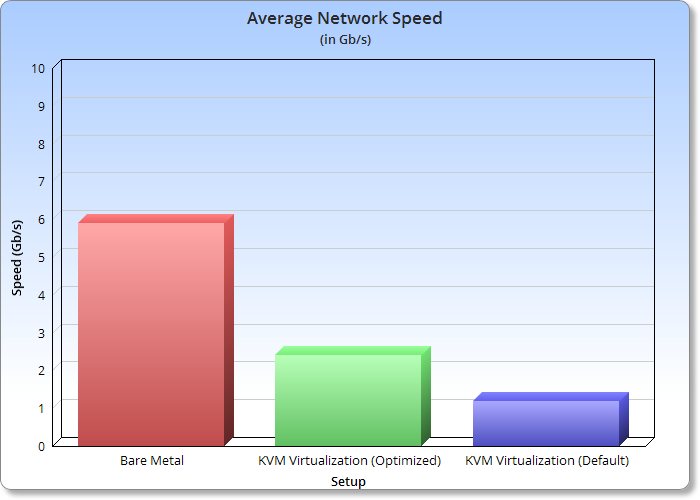
We seem to cap out at just under 6 Gb/s which is honestly pretty great for our 8 year old server. Since my NAS server writes to it's disks at about 3.6Gbs and reads at about 4.8Gbs, network will likely no longer be the bottleneck and that's good enough for me.
Part 6: Conclusion
So that's the first part of our router build down.
For $325, we built our own router and had it perform all the duties of a normal conventional router. If you have an extra machine laying around, you could use that and just throw in a cheap 10gbe network card from eBay. I've seen 2-port ones for only $40 or so.
Virtualization only provided us with 2.4Gbit/s while running bare-metal provided us with just under 6Gbit/s of speed while being much easier to configure.
All we have left now is to configure OpenVPN to allow us to access our network from anywhere.
Side Note - pfSense with Docker
First off, I'm not against docker. I use docker both at work and for some of my web applications and absolutely love it. I just hate certain people treating it like the do-all end-all solution for literally everything.
Docker is the trendy thing at the moment, so naturally there are people who believe that literally everything is a nail to hit with the docker hammer. I originally proposed this as a joke to one of friends, but it turns out that a surprising amount of people are actually trying this. One of them even wrote an article about how "KVM/VMWare/Hyper-V are dead" (despite docker on windows actually using Hyper-V or WSL-2 which also uses Hyper-V).
At the time of this writing, docker is unsupported on FreeBSD since it requires a bunch of linux-only modules. Thus, the only way to run it is in a virtual machine. However, in pursuit of REALLY wanting to make docker the silver bullet, people have gone to running pfSense on top of KVM on top of a Debian container on top of Docker on top of Linux. I've already incurred a large performance loss by going to KVM, so running another layer of abstraction will only further degrade the performance.